Paste a single prompt into AI coding agents (Claude Code, Codex, Copilot CLI, etc.) to set up an AITuber streaming template on your machine.
How to use
Pick one of the samples below
Click "Copy prompt"
Paste it into your AI agent (Claude Code, etc.) and run it
The agent runs git clone / npm install / npm run dev (approve any permission prompts as they appear)
When it is done, open http://localhost:5173 in your browser
Start with the official CLI: Create AITuber OnAir
If you would rather skip the AI agent, the official starter CLI Create AITuber OnAir scaffolds an AITuber app with a single command. Pick from the same four templates as this page (PNGTuber / VRM / Live2D / Pet).
npm create aituber-onair@latest
The generated app is built on Vite + React + TypeScript. Once it is running, configure the LLM, text-to-speech (TTS), live chat integration, and the rest of the AITuber streaming features from the browser-based Settings screen.
Prerequisites & what you need to do yourself
The AI agent only handles cloning the repo, installing dependencies, and starting the dev server. Anything else is up to you.
Required environment
Node.js (LTS recommended) and npm
git
Chrome (uses the Web Speech API)
What you need to provide yourself
An API key for an LLM provider (one of OpenAI / Gemini / Claude / OpenRouter / xAI / zAI / Kimi). This template is a foundation for building your own AI streamer — choose your LLM and obtain the key yourself.
After launching, set the API key and model from the Settings screen. Settings are stored in localStorage.
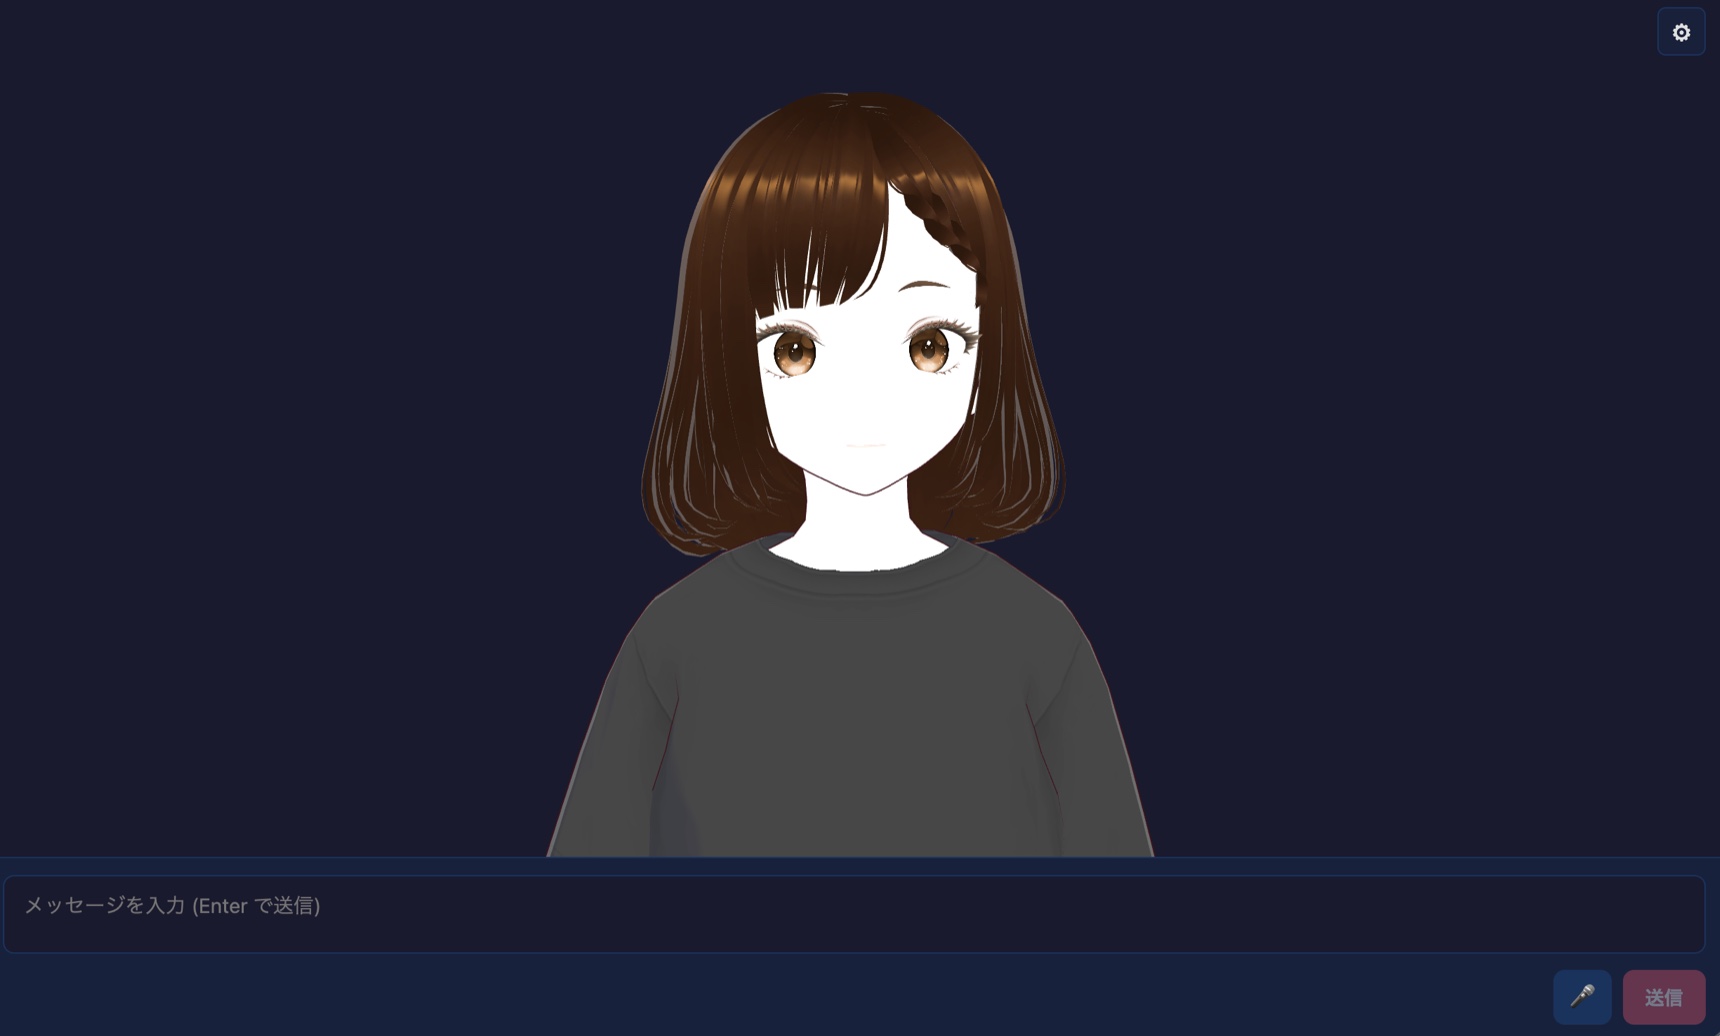
(Optional) PNGTuber avatar images. The app works with an SVG fallback if you skip this — start it first and swap images later.
Security
The prompt only does this: git clone the public repository shinshin86/aituber-onair and run npm install + npm run dev in the sample directory. You can review the full prompt from "Show full prompt" on each card.
API keys are stored in plain text in the browser localStorage. Do not use production-scope credentials, and rotate keys after using them on shared machines.
This is a developer sample. Do not deploy it to shared or public origins as-is.
When the AI agent runs commands, you may see permission prompts (in Claude Code and similar tools). Review the full prompt and approve only after you are comfortable with what it runs.
Choose a sample
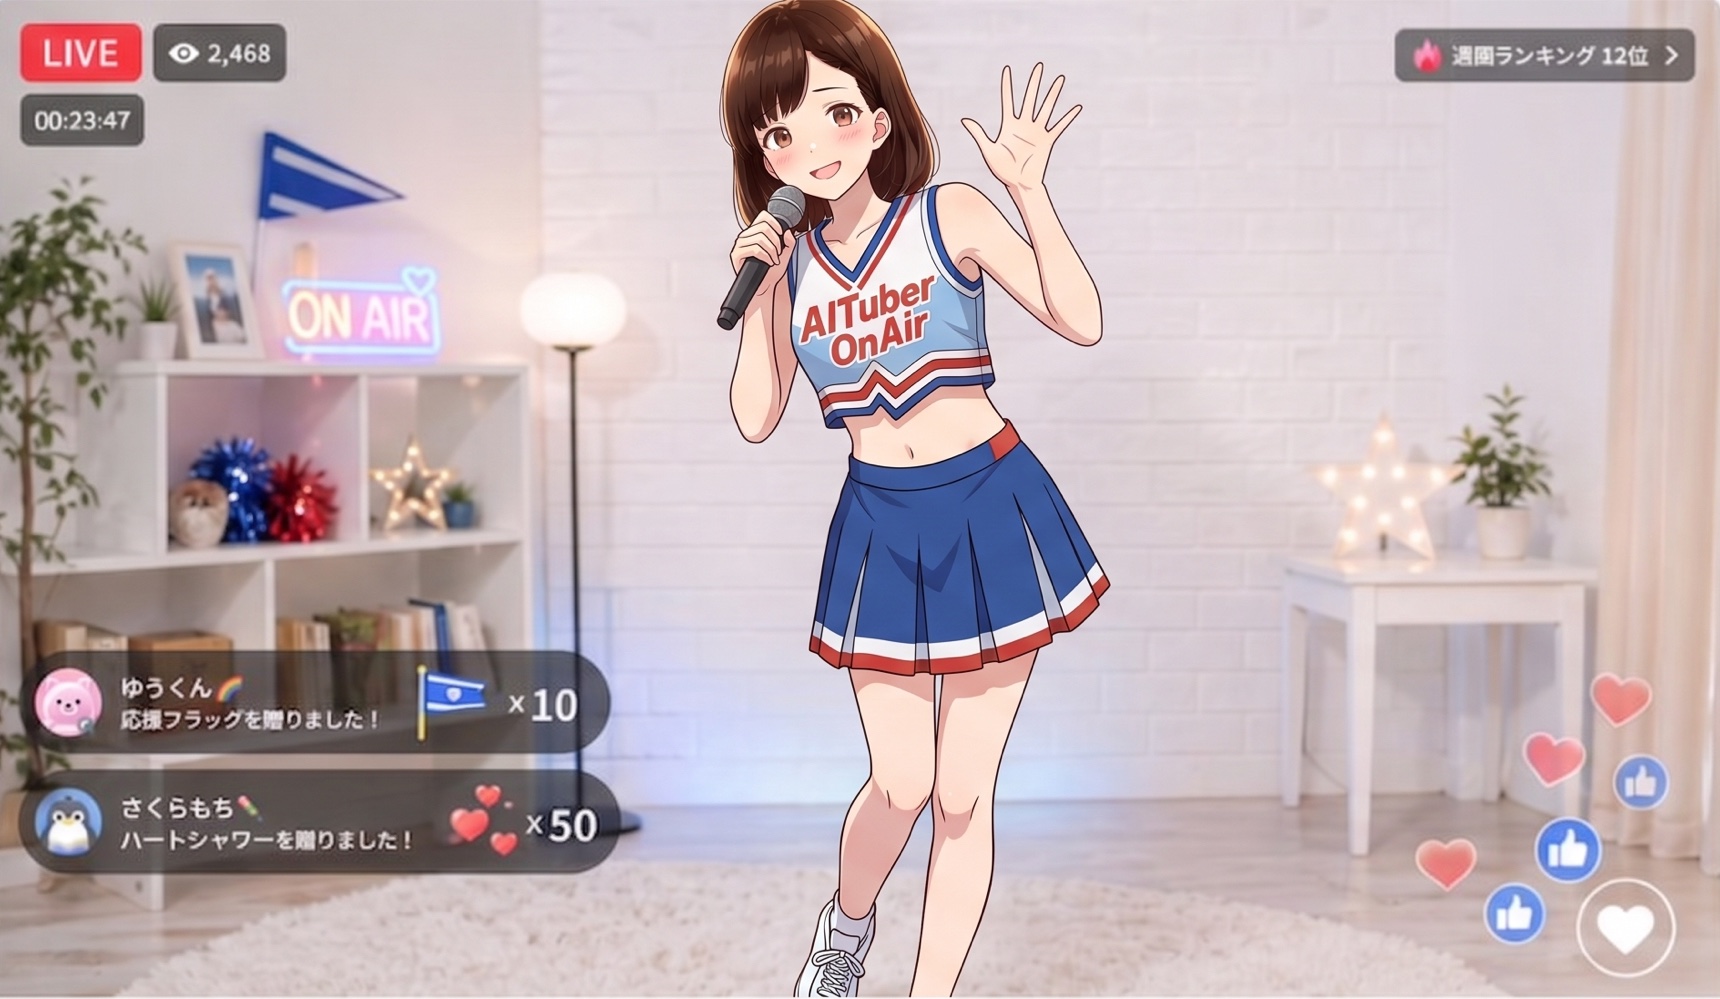
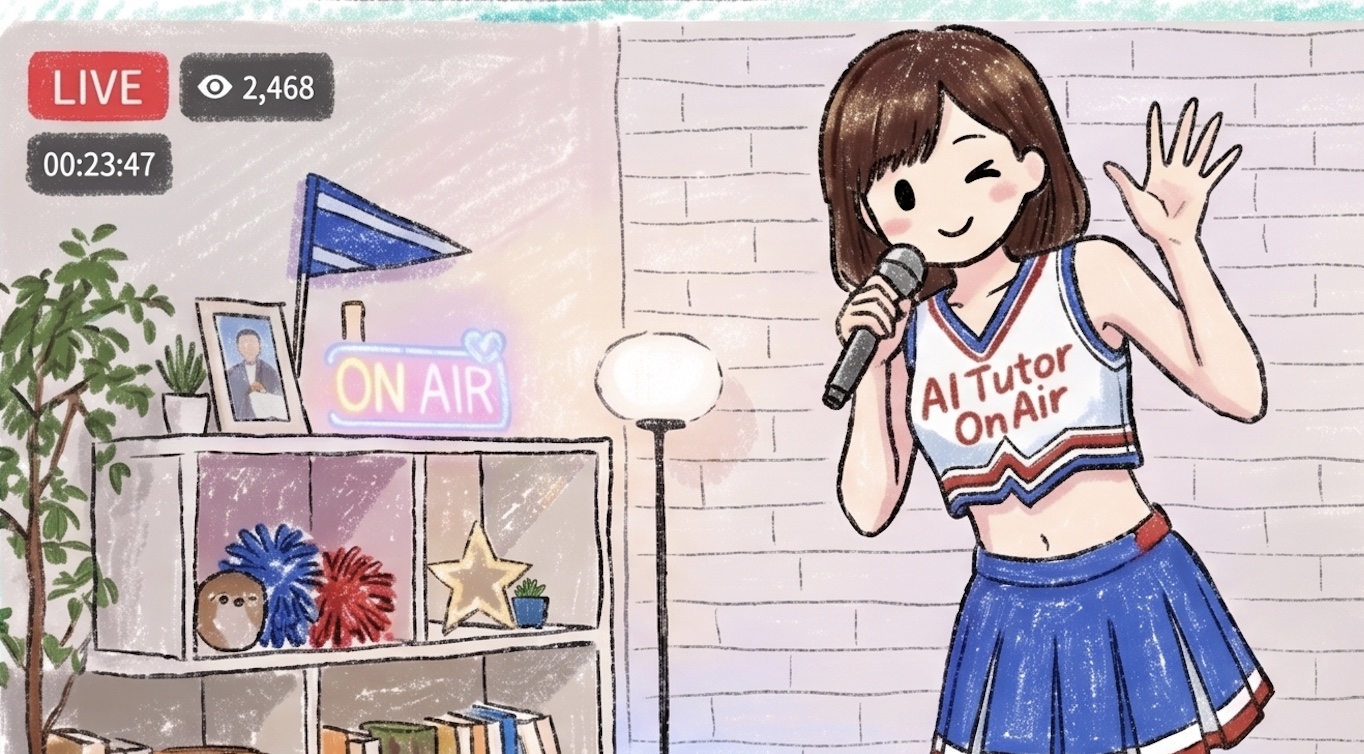
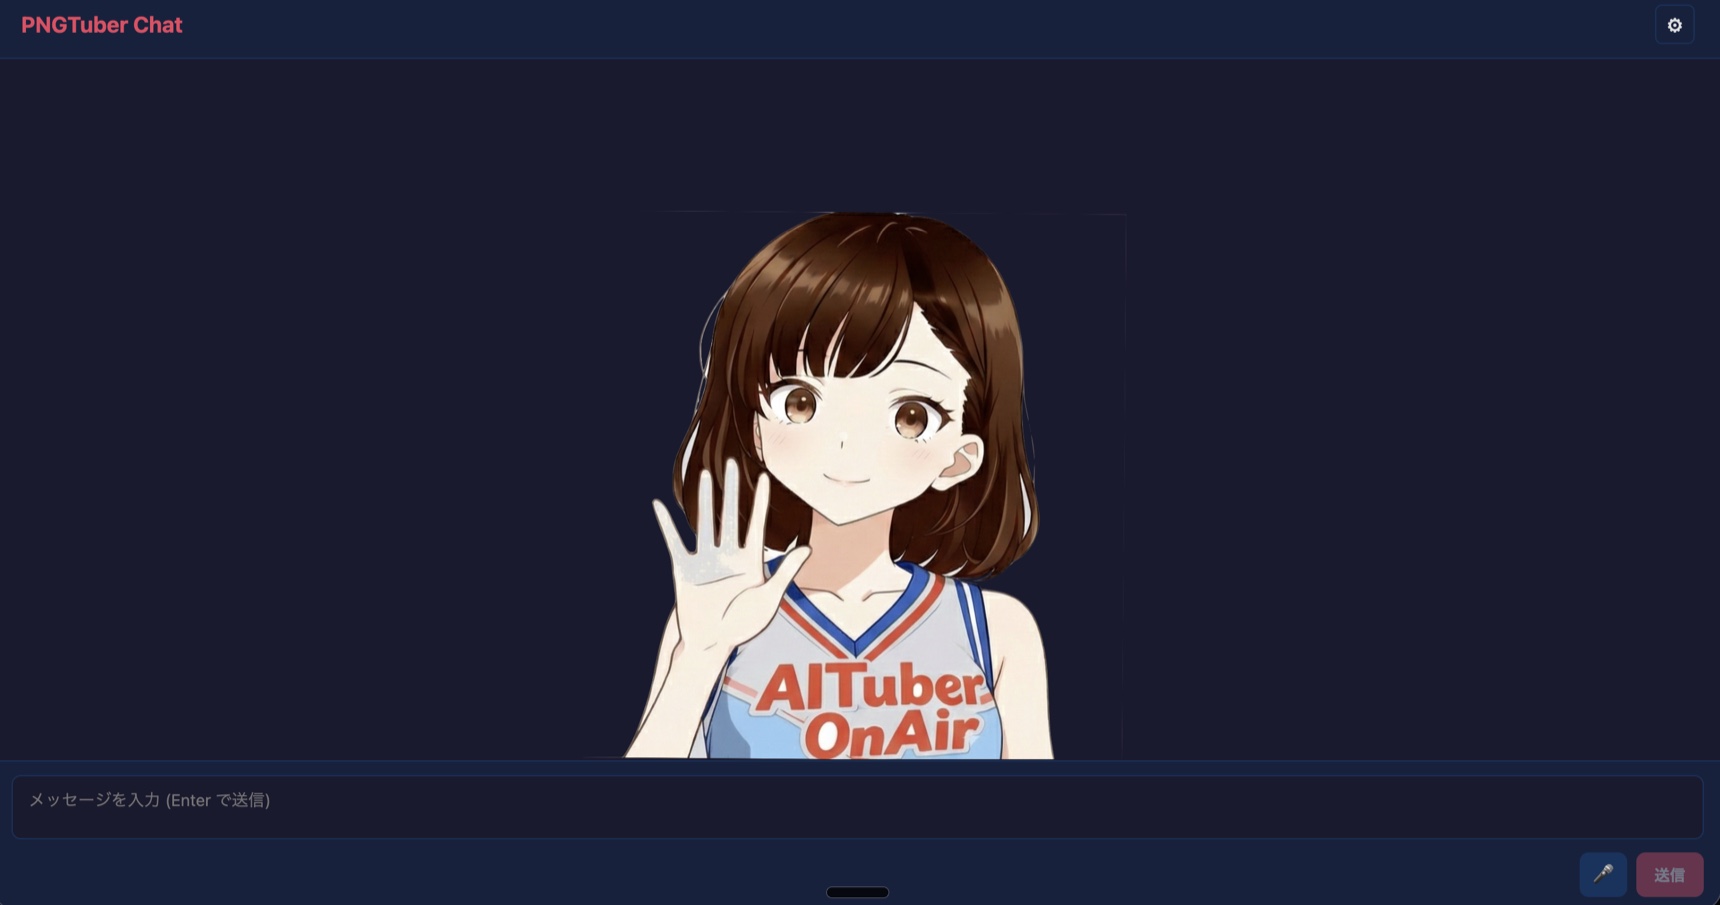
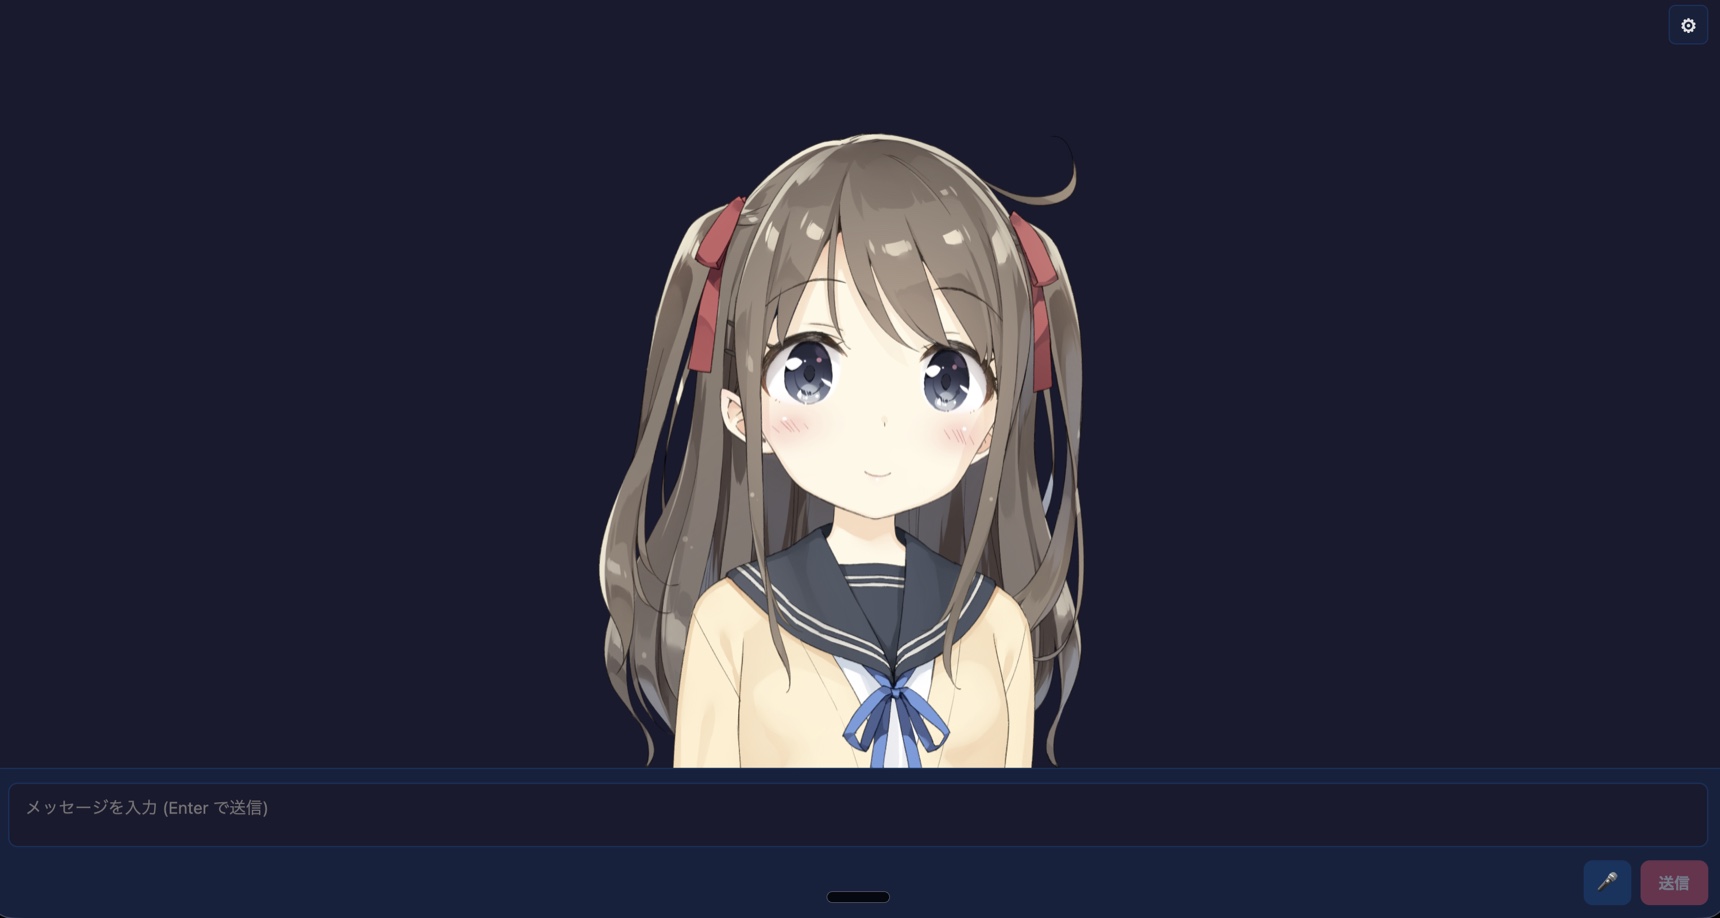
PNGTuber 2D / Quickest to try
2D PNG-swap avatar. The app works even without avatar images thanks to an SVG fallback, so it runs in the shortest time as long as you have an LLM provider API key. Recommended for first-timers.
Set up the AITuber streaming template "react-pngtuber-app" (a 2D PNG-swap avatar sample) on this machine.

## Goal
Clone `https://github.com/shinshin86/aituber-onair` locally, start the dev server in `packages/core/examples/react-pngtuber-app`, and make it accessible at `http://localhost:5173` in the browser.

## Prerequisites
- Node.js (LTS recommended) and npm available
- git available
- Browser is assumed to be Chrome (the app uses the Web Speech API)

If anything is missing, stop there and let the user know.

## Steps

1. If `aituber-onair/` does not already exist in the current working directory, clone it:

   git clone https://github.com/shinshin86/aituber-onair.git

   If it already exists, you can reuse it.

2. Move into the sample app directory:

   cd aituber-onair/packages/core/examples/react-pngtuber-app

3. Install dependencies:

   npm install

4. Start the dev server:

   npm run dev

   This command stays in the foreground. If your tool can run it in the background, that's fine. Otherwise, tell the user to run this command in a separate terminal.

5. Tell the user to open `http://localhost:5173` in their browser.

## Tasks for the user (do NOT do these yourself)

These require API keys or local assets that the user must provide. Just guide them through the steps.

- Obtain an API key for the LLM provider they want to use (one of OpenAI / Gemini / Claude / OpenRouter / xAI / zAI / Kimi)
- In the browser, open "Settings" in the top right, paste the API key for the chosen provider, and select a model
  - Settings are saved in `localStorage` (key: `react-pngtuber-app-settings`)
- (Optional) Place avatar images under `public/avatar/`:
  - mouth_close_eyes_open.png
  - mouth_close_eyes_close.png
  - mouth_open_eyes_open.png
  - mouth_open_eyes_close.png
  - The app falls back to an SVG avatar if any are missing

## Reference docs (consult when you need details)

- Sample README: https://github.com/shinshin86/aituber-onair/blob/main/packages/core/examples/react-pngtuber-app/README.md
- Setup guide covering all 3 avatar styles (detailed reference material for AI agents): https://start-aituber-with-ai-agent.aituberonair.com/en/docs/setup-guide.md

## Notes (always communicate these to the user)

- This sample is intended for developers. API keys and similar values are stored in `localStorage` in plain text. Do not use production-scope credentials, and do not deploy this sample to shared or public origins as-is.
- If used on a shared machine, rotate the API keys after use.
First gotcha: After launch, the LLM will not respond until you set the API key in Settings. To just verify it works, the easiest options are openrouter with Fetch free models, or local-only gemini-nano (Chrome 138+).
VRM 3D / VRM avatar
3D VRM avatar style. Real-time lip-sync drives the VRM facial expression, and camera controls (drag to rotate / wheel to zoom) are supported. You need to provide miko.vrm (or any VRM) before launch.
Set up the AITuber streaming template "react-vrm-app" (a 3D VRM avatar sample) on this machine.

## Goal
Clone `https://github.com/shinshin86/aituber-onair` locally, start the dev server in `packages/core/examples/react-vrm-app`, and make it accessible at `http://localhost:5173` in the browser.

## Prerequisites
- Node.js (LTS recommended) and npm available
- git available
- Browser is assumed to be Chrome (the app uses the Web Speech API)

If anything is missing, stop there and let the user know.

## Steps

1. If `aituber-onair/` does not already exist in the current working directory, clone it:

   git clone https://github.com/shinshin86/aituber-onair.git

   If it already exists, you can reuse it.

2. Move into the sample app directory:

   cd aituber-onair/packages/core/examples/react-vrm-app

3. Install dependencies:

   npm install

4. Start the dev server:

   npm run dev

   This command stays in the foreground. If your tool can run it in the background, that's fine. Otherwise, tell the user to run this command in a separate terminal.

5. Tell the user to open `http://localhost:5173` in their browser.

## Tasks for the user (do NOT do these yourself)

These require API keys or external assets (a VRM model). Just guide them through the steps.

- Obtain an API key for the LLM provider they want to use (one of OpenAI / Gemini / Claude / OpenRouter / xAI / zAI / Kimi)
- In the browser, open "Settings" in the top right, paste the API key for the chosen provider, and select a model
  - Settings are saved in `localStorage` (key: `react-vrm-app-settings`)
- Place a VRM model (required):
  - The recommended model is `miko.vrm`. Download it from https://miko.aituberonair.com/ and place it at `packages/core/examples/react-vrm-app/public/avatar/miko.vrm`
  - If not placed, a load error appears on the avatar stage (the dev server itself still starts)
- (Optional) Place an idle animation `idle_loop.vrma` at `public/avatar/idle_loop.vrma`
  - You can reuse the asset from pixiv/ChatVRM (https://github.com/pixiv/ChatVRM)
  - If not placed, only the animation is skipped; everything else still works
- (Optional) Background image can be uploaded from Settings (memory-only, reset on page reload)

## Reference docs (consult when you need details)

- Sample README: https://github.com/shinshin86/aituber-onair/blob/main/packages/core/examples/react-vrm-app/README.md
- Setup guide covering all 3 avatar styles (detailed reference material for AI agents): https://start-aituber-with-ai-agent.aituberonair.com/en/docs/setup-guide.md

## Notes (always communicate these to the user)

- This sample is intended for developers. API keys and similar values are stored in `localStorage` in plain text. Do not use production-scope credentials, and do not deploy this sample to shared or public origins as-is.
- If used on a shared machine, rotate the API keys after use.
After launch: You need to place a VRM model (such as miko.vrm) under public/avatar/. The dev server still starts without it, but no avatar will be displayed.
Live2D Live2D model loading
Live2D model style. Downloading Cubism Core (Live2D official) requires accepting the Live2D license, and you need to provide the model itself. This sample requires substantial manual setup — best suited for users who already have a Live2D model.
This screenshot shows the official Live2D sample model "Hiyori Momose" loaded into the app. The model data is not bundled with AITuber OnAir. Sample data / Usage terms
Set up the AITuber streaming template "react-live2d-app" (a Live2D model loading sample) on this machine.

## Goal
Clone `https://github.com/shinshin86/aituber-onair` locally, start the dev server in `packages/core/examples/react-live2d-app`, and make it accessible at `http://localhost:5173` in the browser.

## Prerequisites
- Node.js (LTS recommended) and npm available
- git available
- Browser is assumed to be Chrome (the app uses the Web Speech API)

If anything is missing, stop there and let the user know.

## Steps

1. If `aituber-onair/` does not already exist in the current working directory, clone it:

   git clone https://github.com/shinshin86/aituber-onair.git

   If it already exists, you can reuse it.

2. Move into the sample app directory:

   cd aituber-onair/packages/core/examples/react-live2d-app

3. Install dependencies:

   npm install

4. Start the dev server:

   npm run dev

   This command stays in the foreground. If your tool can run it in the background, that's fine. Otherwise, tell the user to run this command in a separate terminal.

5. Tell the user to open `http://localhost:5173` in their browser.

## Tasks for the user (do NOT do these yourself)

These involve license acceptance and user-owned assets, so **you (the AI agent) MUST NOT auto-download these**. Just guide the user through the steps.

- Obtain an API key for the LLM provider they want to use (one of OpenAI / Gemini / Claude / OpenRouter / xAI / zAI / Kimi)
- In the browser, open "設定" (Settings) in the top right, paste the API key for the chosen provider, and select a model

- **Download Cubism Core for Web from the Live2D official site (required, license acceptance involved)**:
  - Official download page: https://www.live2d.com/sdk/download/web/
  - Get either `Cubism Core for Web` or `Cubism SDK for Web`
  - Place the included `live2dcubismcore.min.js` at:
    `packages/core/examples/react-live2d-app/public/scripts/live2dcubismcore.min.js`
  - This sample assumes Cubism 4, so `live2d.min.js` is not needed

- **Place the Live2D model folder (required)**:
  - Place the entire folder containing `.model3.json` and all referenced assets (textures/, motions/), not just the JSON file
  - Destination: `packages/core/examples/react-live2d-app/models/<ModelName>/`
  - Example:
    models/Hiyori/
      Hiyori.model3.json
      Hiyori.moc3
      Hiyori.physics3.json
      textures/texture_00.png
      motions/idle.motion3.json

- **Restart the dev server after adding a model**:
  - The list under `models/` is resolved at server startup, so if you add a model later, restart `npm run dev`

- After launch, open "設定" (Settings) in the browser, choose the model from the list, and click "読み込む" (Load)
  - Model data is memory-only and is cleared on page reload (LLM / TTS settings are saved in `localStorage`)

## Reference docs (consult when you need details)

- Sample README: https://github.com/shinshin86/aituber-onair/blob/main/packages/core/examples/react-live2d-app/README.md
- Setup guide covering all 3 avatar styles (detailed reference material for AI agents): https://start-aituber-with-ai-agent.aituberonair.com/en/docs/setup-guide.md
- Live2D Cubism SDK (Web): https://www.live2d.com/sdk/download/web/

## Notes (always communicate these to the user)

- **The Live2D Cubism Core / SDK is subject to Live2D's license. You (the AI agent) must NOT obtain it from anywhere other than the official site, and must NOT bundle it into the repository.** The user must download it themselves from the official site.
- This sample is intended for developers. API keys and similar values are stored in `localStorage` in plain text. Do not use production-scope credentials, and do not deploy this sample to shared or public origins as-is.
- If used on a shared machine, rotate the API keys after use.
After launch: Download Cubism Core from the Live2D official site and place it at public/scripts/live2dcubismcore.min.js, then place a Live2D model folder under models/. Restart the dev server after adding new models.
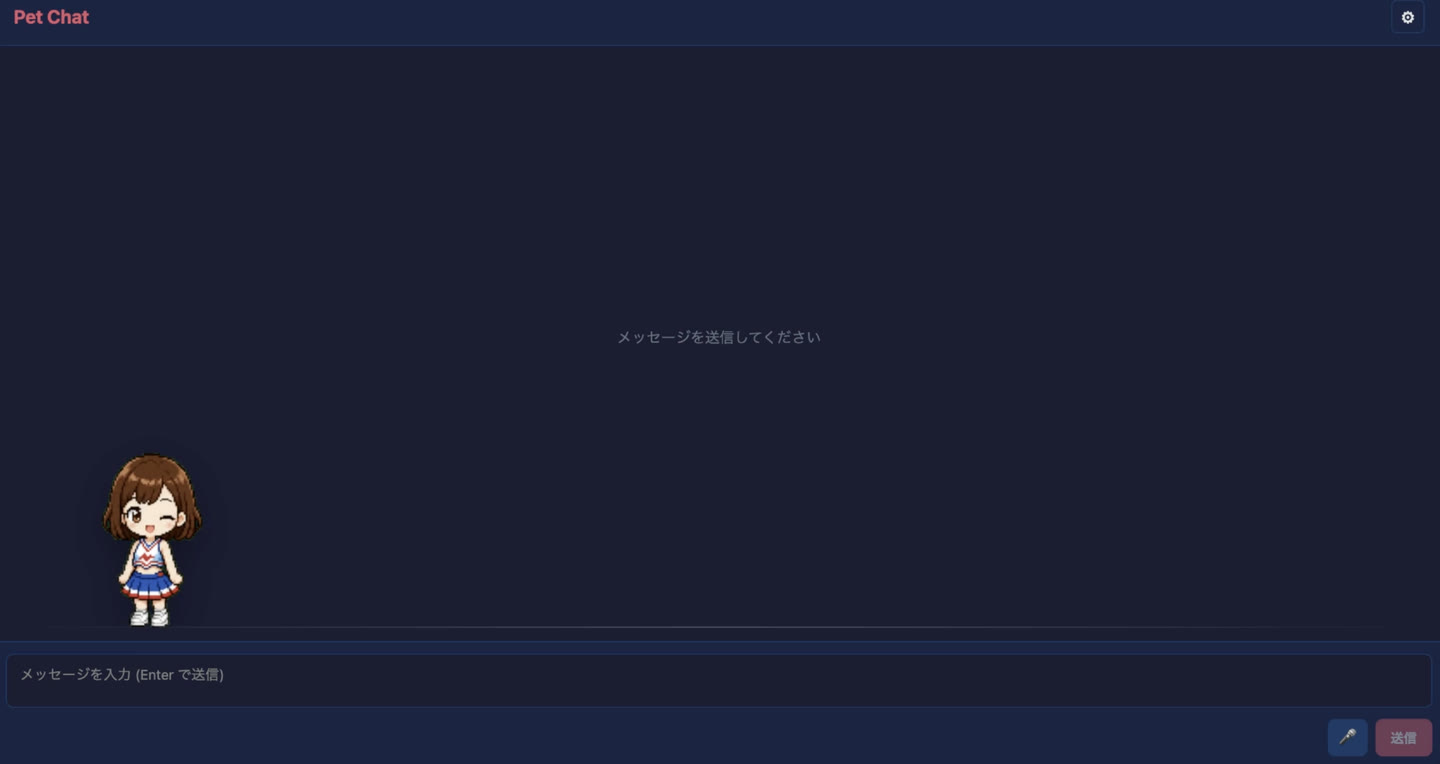
Pet Chat 2D / Animated Pet
Animated Pet sample with bundled Miko assets. The pet runs, jumps, waits, and reacts while the AI speaks, so you can try a characterful AITuber experience without preparing avatar files first.
Set up the AITuber streaming template "react-pet-app" (an animated Pet sample with bundled Miko assets) on this machine.

## Goal
Clone https://github.com/shinshin86/aituber-onair locally, start the dev server in packages/core/examples/react-pet-app, and make it accessible at http://localhost:5173 in the browser.

## Prerequisites
- Node.js (LTS recommended) and npm available
- git available
- Browser is assumed to be Chrome (the app uses the Web Speech API)

If anything is missing, stop there and let the user know.

## Steps

1. If aituber-onair/ does not already exist in the current working directory, clone it:

   git clone https://github.com/shinshin86/aituber-onair.git

   If it already exists, you can reuse it.

2. Move into the sample app directory:

   cd aituber-onair/packages/core/examples/react-pet-app

3. Install dependencies:

   npm install

4. Start the dev server:

   npm run dev

   This command stays in the foreground. If your tool can run it in the background, that's fine. Otherwise, tell the user to run this command in a separate terminal.

5. Tell the user to open http://localhost:5173 in their browser.

## Tasks for the user (do NOT do these yourself)

- Obtain an API key for the LLM provider they want to use (one of OpenAI / Gemini / Claude / OpenRouter / xAI / zAI / Kimi)
- In the browser, open Settings in the top right, paste the API key for the chosen provider, and select a model
  - Settings are saved in localStorage (key: react-pet-app-settings)
- The bundled Miko pet loads from public/pet/pet.json and public/pet/spritesheet.webp, so no extra visual assets are required
- (Optional) To use a custom pet, register pet.json and the spritesheet from the Pet section in Settings

## Reference docs (consult when you need details)

- Sample README: https://github.com/shinshin86/aituber-onair/blob/main/packages/core/examples/react-pet-app/README.md
- Setup guide (detailed reference material for AI agents): https://start-aituber-with-ai-agent.aituberonair.com/en/docs/setup-guide.md

## Notes (always communicate these to the user)

- This sample is intended for developers. API keys and similar values are stored in localStorage in plain text. Do not use production-scope credentials, and do not deploy this sample to shared or public origins as-is.
- If you redistribute custom Pet assets, confirm that you have the right to use and redistribute them.
- If used on a shared machine, rotate the API keys after use.
After launch: Miko is bundled and works without extra assets. To use your own pet, register pet.json and the spritesheet from the Pet section in Settings.